Developing a Custom Acrylic Map Display: From Design Drawings to the First Prototype
A customer recently contacted us about a custom display project. The idea was to create an 8 × 10-inch black acrylic plaque featuring a map of Broadway, with gold street lines, lettering, and small pins marking individual theater locations.
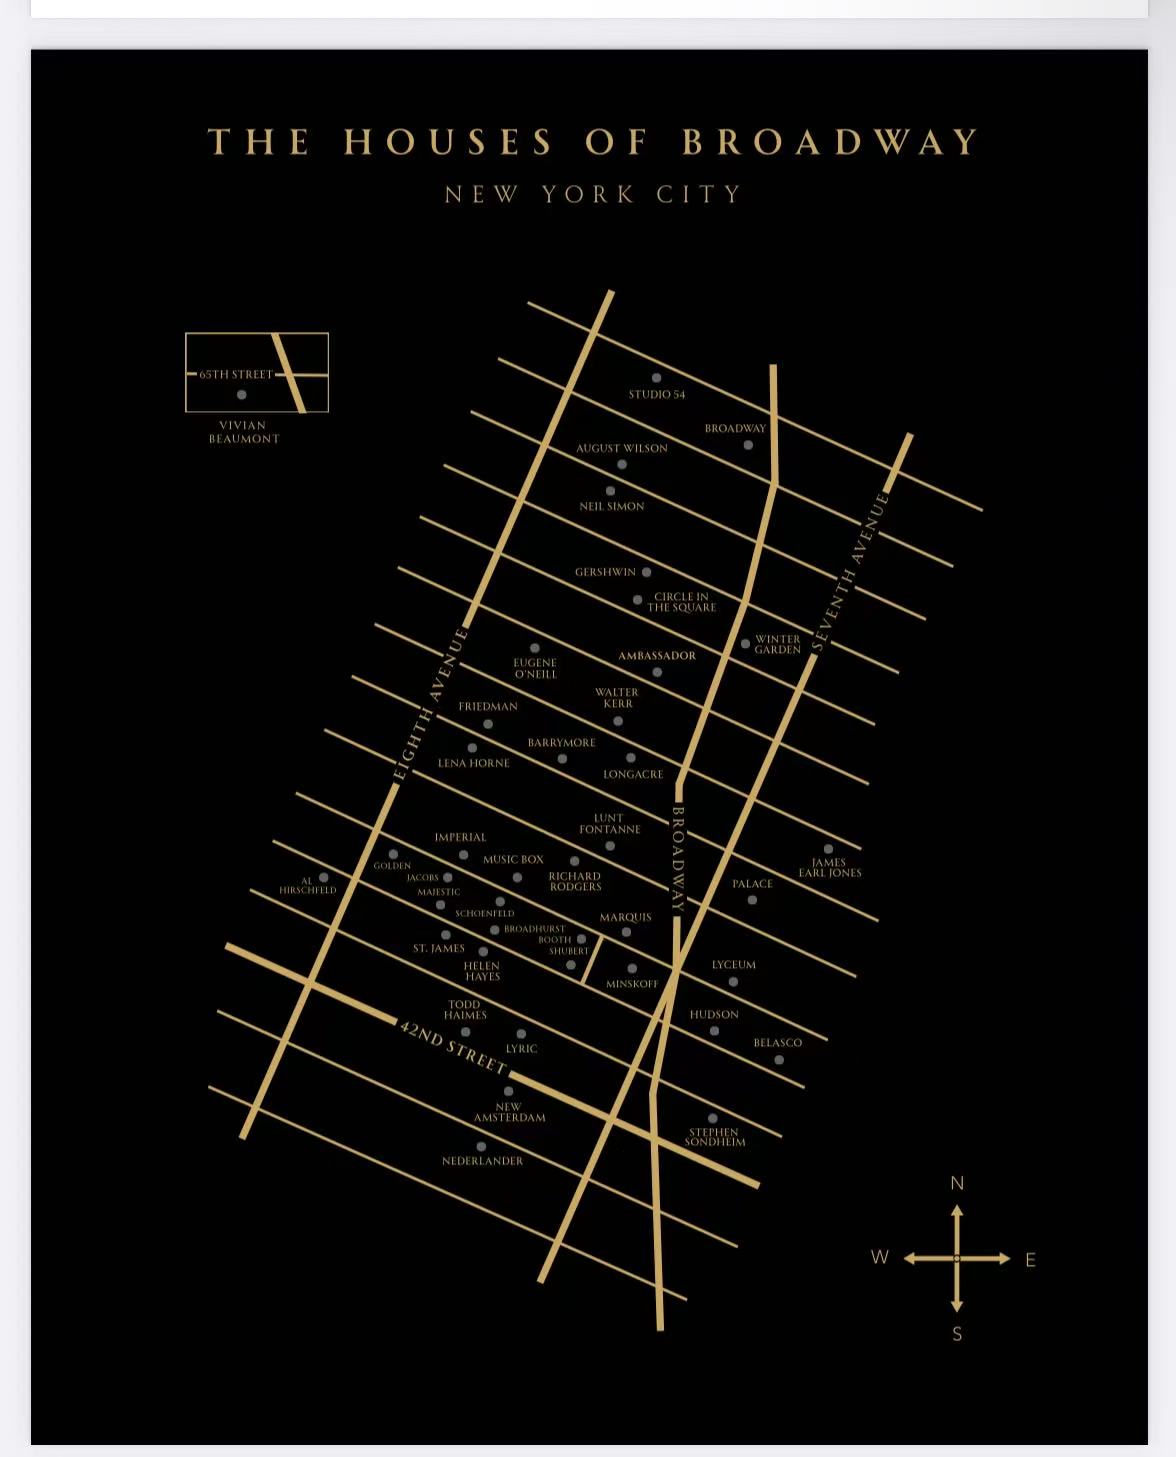
At first glance, the design looked straightforward: a black acrylic panel with gold details.
But once we started discussing the manufacturing process, we realized there were quite a few details to work through.
The customer wanted the main street lines and title to stand out from the surface, while the smaller text and other details remained flat. There were also 41 holes to accommodate small gold-colored pins. The finished piece needed to look refined, but it also had to be practical to manufacture if the project moved into larger production.
Here is how we approached the project.
Finding the Right Way to Create the Gold Details
One of the first questions was how to achieve the gold finish.
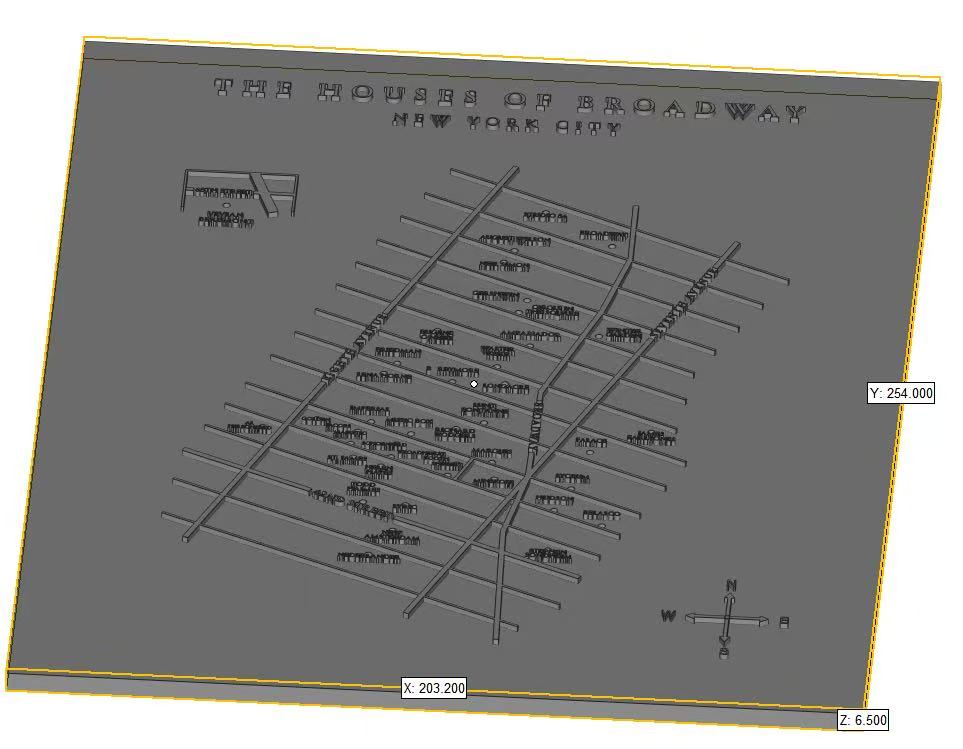
The customer wanted something that looked like real metallic gold rather than ordinary yellow printing. More importantly, the main street lines and title needed to be physically raised by around 1–1.5 mm.
We initially discussed several options, including UV printing, PVD coating, and hot stamping.
UV printing was worth considering because it could reproduce the gold graphics at a lower cost. However, conventional UV printing would leave the graphics flat against the acrylic surface. It would not create the raised effect shown in the customer’s design.
PVD coating was another option we recommended exploring because of its metallic appearance and potential suitability for the raised details.
The customer then suggested another idea: could we make the raised elements separately, apply a gold finish, and attach them to the black acrylic?
It was a reasonable question, so we looked into it rather than dismissing it straight away.
The difficulty was the amount of fine detail in the design. The street lines were relatively intricate, and some of the lettering was small. Making and attaching all those individual pieces by hand could make alignment difficult and affect consistency. It could also add more cost than expected.
We discussed these limitations with the customer and explored another 3D relief process that offered a more practical alternative to the original approach.
There was no point recommending a process simply because it sounded good on paper. We needed to find one that could reproduce the intended appearance without making the product unnecessarily complicated or expensive.
The 41 Holes Were More Important Than They First Appeared
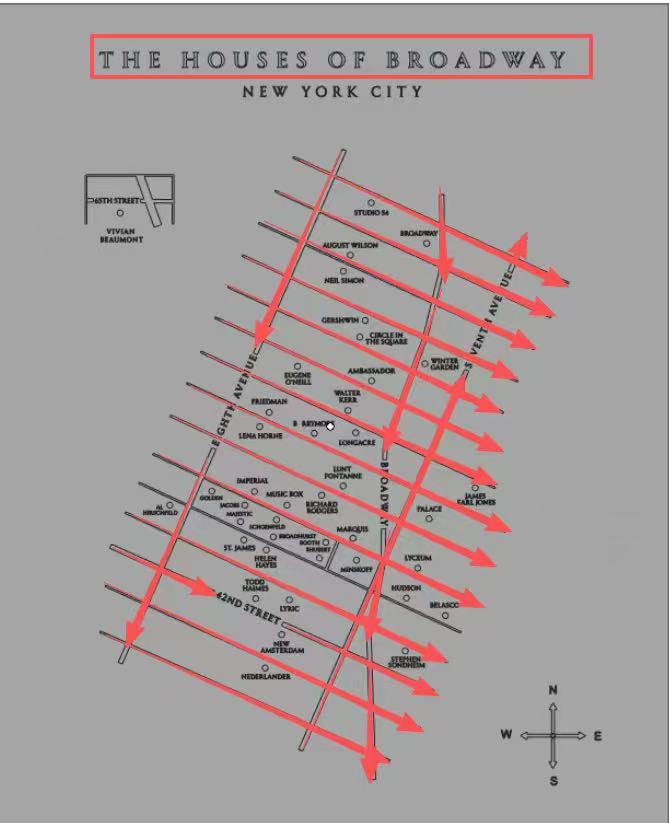
The next challenge was the positioning of the 41 marker pins.
Each pin needed to fit into a specific location on the map. The holes therefore had to be accurate, but their dimensions also needed to work with the actual pins.
The original plan was to drill blind holes into the 5 mm black acrylic panel. We proposed a depth of 2.5 mm to reduce the risk of drilling through the material.
After checking the available pin options, the customer considered using shorter pins and asked whether we could increase the hole depth to 3 mm.
We agreed that this could be considered, provided the pin dimensions and final specifications were confirmed. We also suggested allowing a little more tolerance in the hole diameter so the pins could be inserted without excessive difficulty.
This might sound like a small adjustment, but it matters in a product with dozens of individual components.
If the holes are too tight, inserting the pins becomes frustrating. If they are too loose, the pins may not stay in place as intended.
The goal was to find a fit that worked in practice, rather than relying on nominal dimensions alone.
Then the Customer Had Another Idea
Just as the initial sample was underway, the customer raised a new concern.
The original pins might be too small for people to handle comfortably. If someone placed a marker in the wrong hole, they should be able to remove it and put it somewhere else.
A more traditional push pin with a small gold-colored head might be easier to use.
That changed the question. We were no longer looking only at how to fit a pin into a blind hole. We also needed to consider how the pin would be held in place while remaining removable.
One possibility was to drill through the acrylic and add a backing material, such as black MDF, foam, or cork.
The customer suggested using a thin MDF backing and pointed out a potential problem: the extra layer might be visible from the sides, making the plaque look different from the solid acrylic piece originally envisioned.
They also asked whether a narrow black acrylic frame could conceal the backing.
We thought the idea was feasible and agreed to discuss it with our technical team.
There were still questions to answer. The backing would need to be thick enough to hold the pin securely without allowing it to protrude through the rear. The pin length, backing thickness, overall construction, and appearance of the edges would all need to be considered together.
We also discussed alternatives, including securing the pins permanently or using a different pin design. However, the customer preferred a solution that would allow occasional repositioning without glue or an awkward fastening system.
At this stage, we did not want to promise that one particular structure would be the best choice before reviewing the details.
Instead, we continued with the original sample while evaluating the proposed change separately.
That way, the work already underway could continue, and we could still consider improvements before moving toward production.
Why We Started With a Sample
For a project like this, a drawing can tell us a great deal, but it cannot answer every question.
The design specifies the dimensions and the intended appearance. It does not necessarily tell us exactly how the gold finish will look under real lighting, whether the raised details will have the right visual weight, or how easily the pins can be inserted and repositioned.
These are things we need to examine on an actual sample.
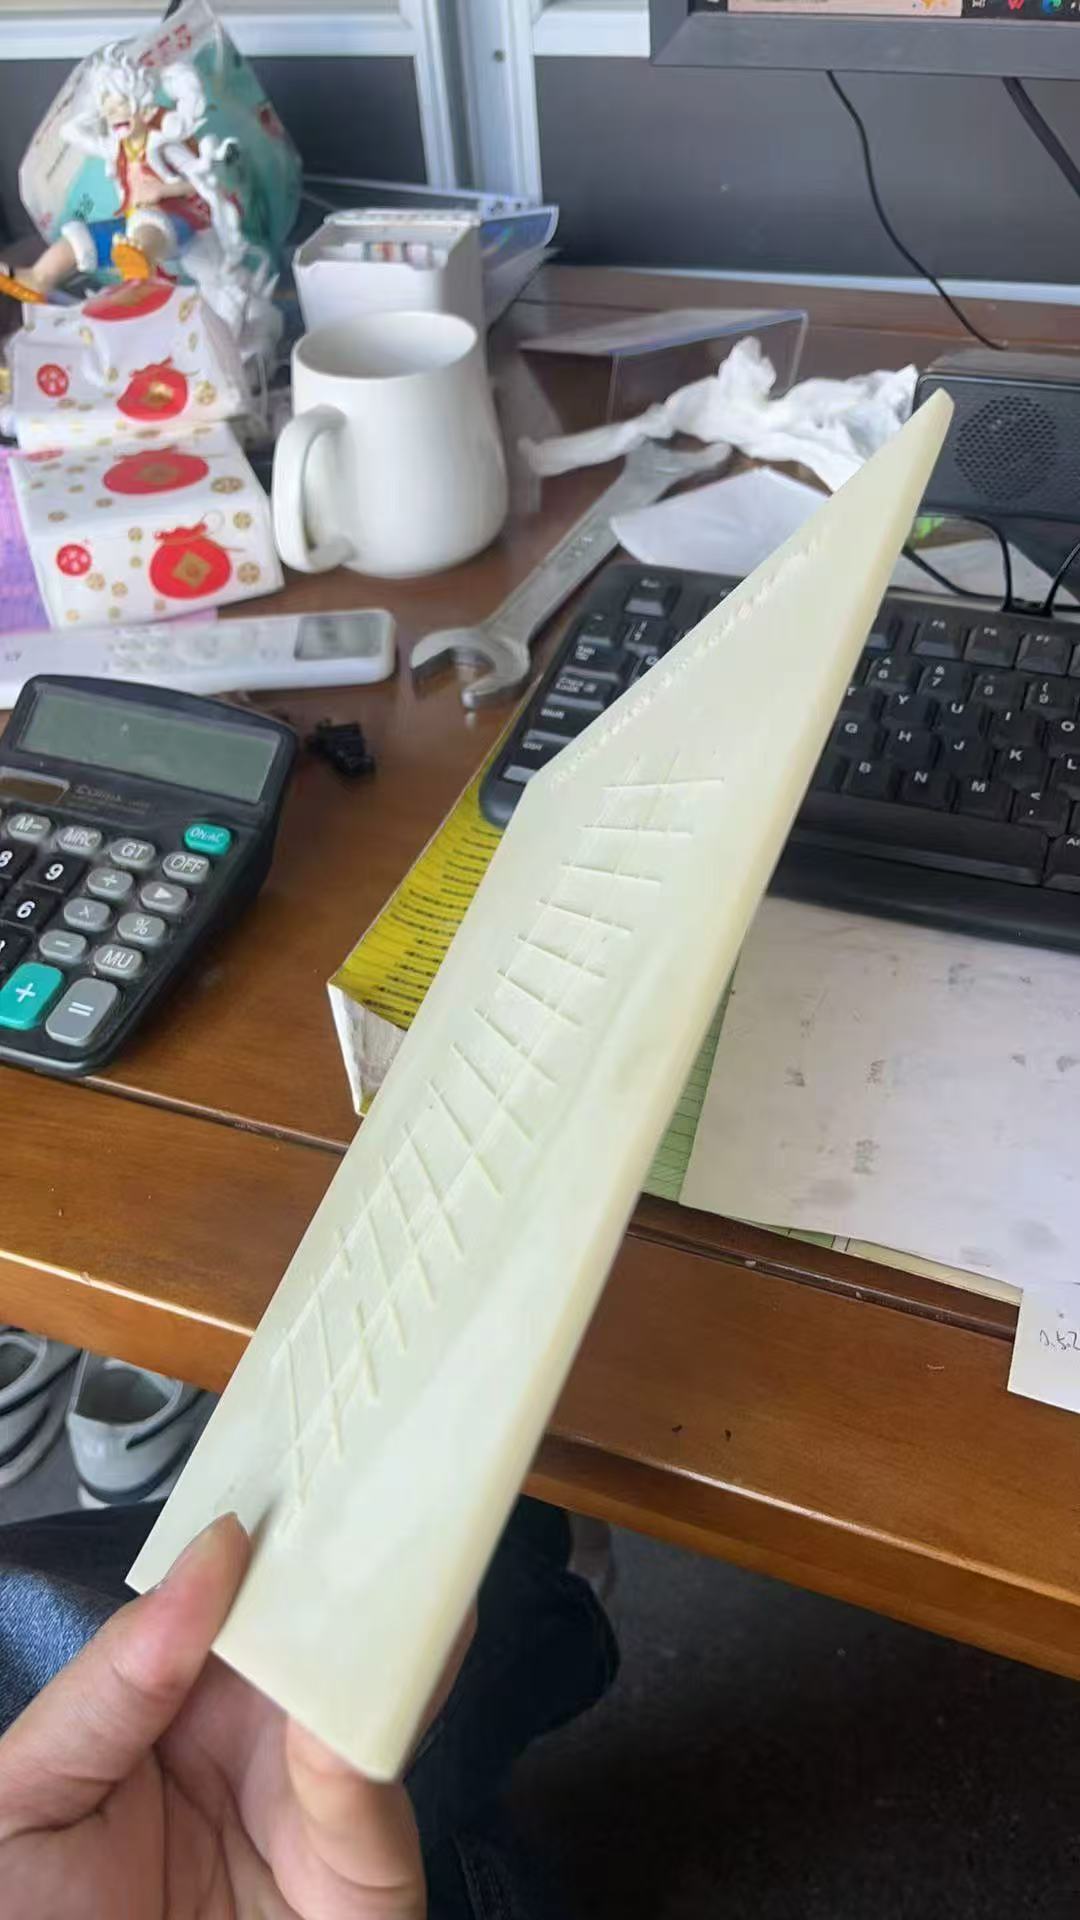
For this project, the first prototype was intended to help us assess the raised gold details, the overall appearance against the glossy black acrylic, and the fit of the marker pins.
If the customer wanted a more metallic gold appearance, we could discuss possible adjustments to the finish before moving into larger production.
We offered to waive the sample charge, with the customer covering international shipping. The estimated sample production time was seven days.
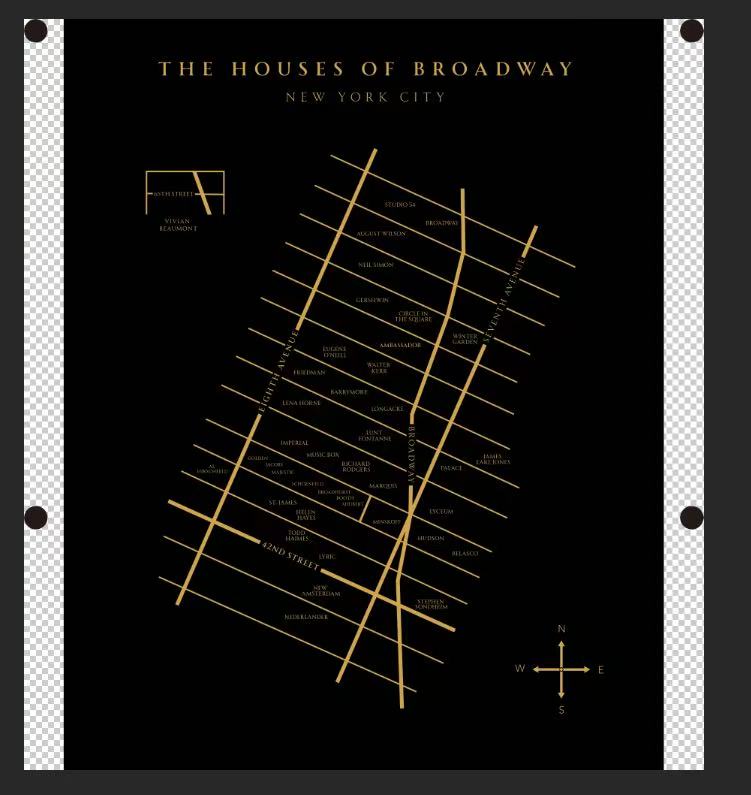
By the latest stage of our correspondence, the first sample was still being completed, and the alternative backing design was under discussion. The final structure and finish had not yet been approved for mass production.
We preferred to be clear about that. A sample is not just a formality before placing a bulk order. It is an opportunity to check the details that matter and decide whether anything needs to change.
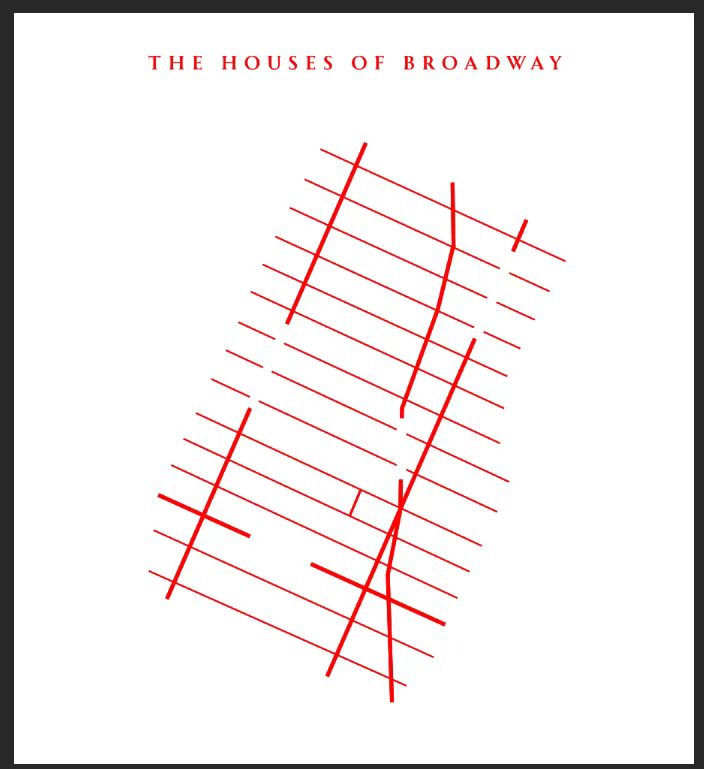
What We Learned From This Project
The most interesting part of this project was not the black acrylic panel itself. It was the series of small decisions that came after the initial design.
We discussed how to make the gold details look more realistic, why flat printing would not achieve the requested raised effect, how to balance manufacturing cost against appearance, and how to make the marker pins easier to use.
The design also changed as the customer thought more about the finished product. That is normal when developing something new. Sometimes a question only becomes apparent once you start thinking about how the product will be handled, assembled, and used.
Our job is to work through those questions with the customer, explain the practical differences between the available options, and help identify a solution worth testing.
We do not expect every project to arrive with a complete manufacturing plan. Often, the customer knows what they want the finished product to look like but needs help working out how to make it.
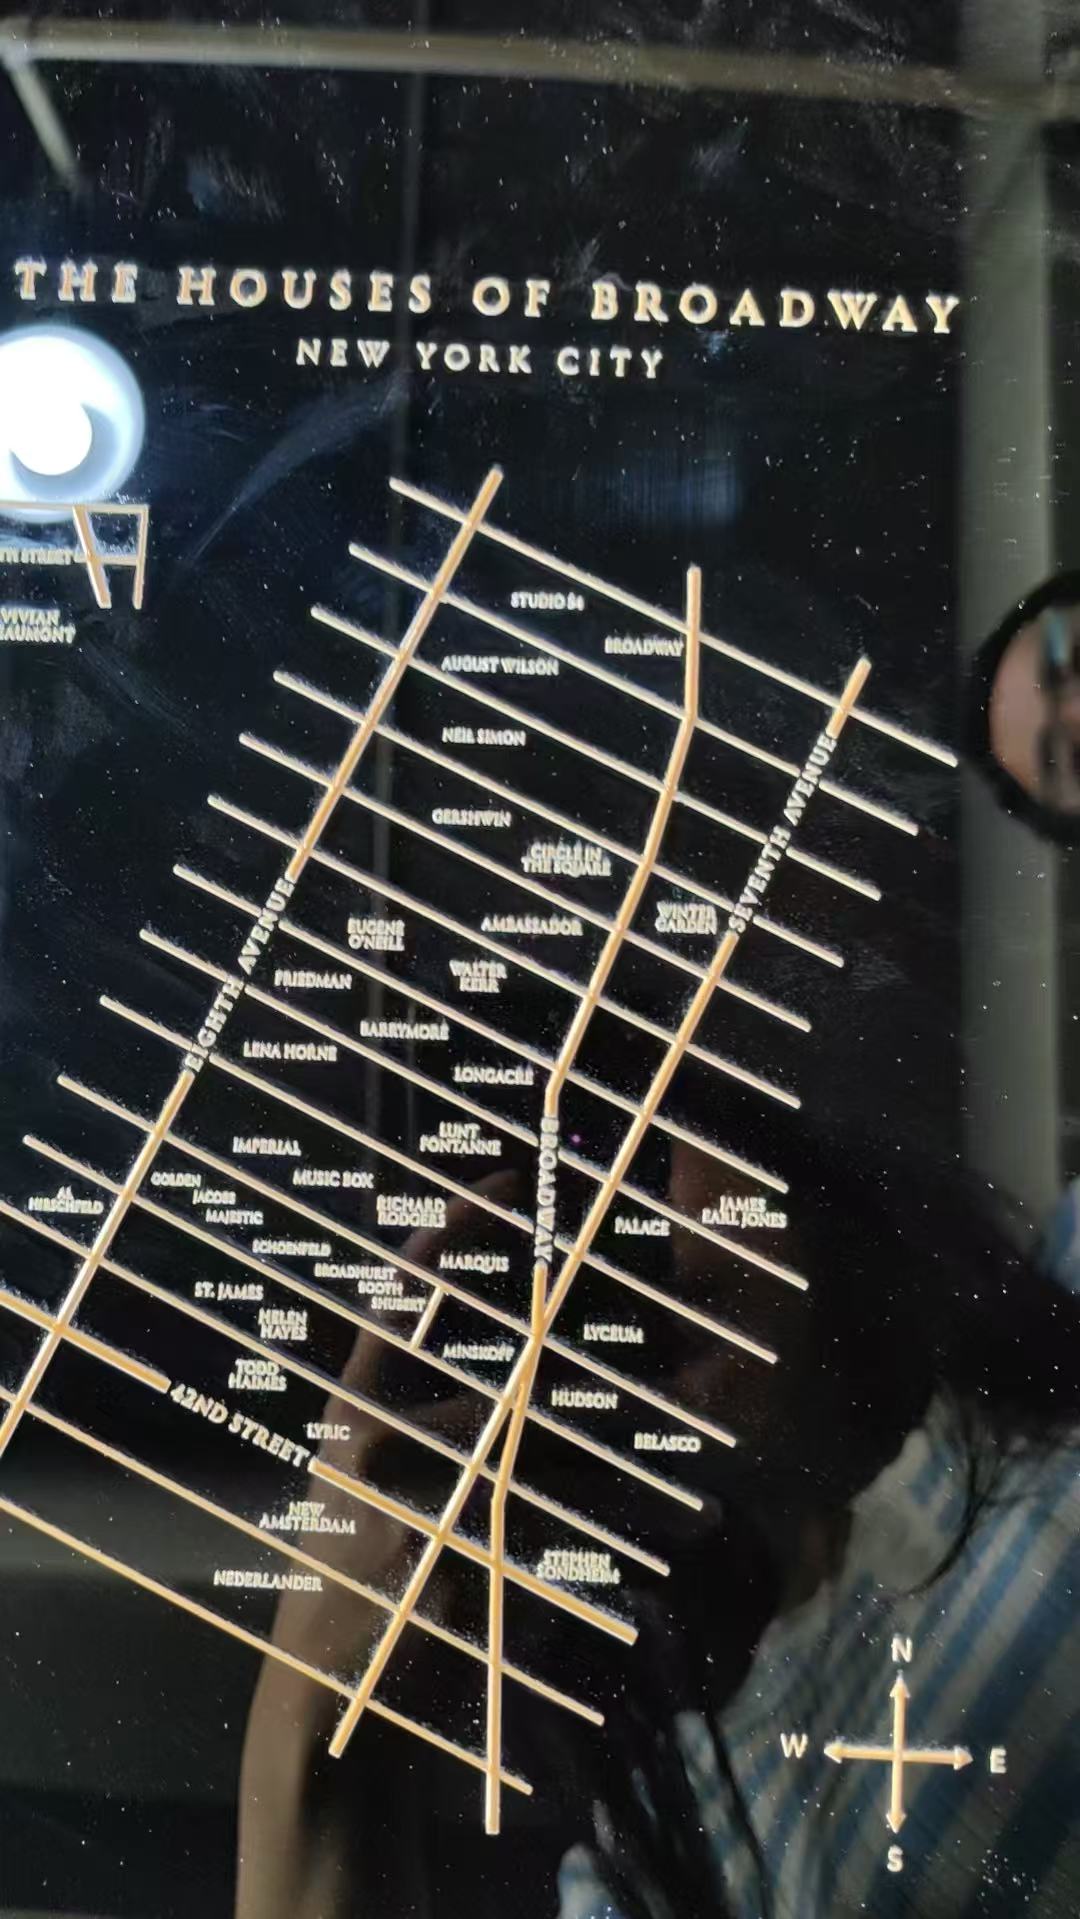
That is where we can help.
Have a Custom Acrylic Design in Mind?
At Max Custom Acrylics, we work with customers on custom acrylic displays, decorative products, retail fixtures, awards, and other made-to-order projects.
If you have a drawing, a reference image, or even an early-stage concept, we can review the requirements and discuss suitable materials, finishing methods, machining details, and prototype options.
You do not need to have every detail figured out before getting in touch.
Send us your design at Max Custom Acrylics, and let’s discuss how to bring it into production.